Category Archives: Uncategorized

The A.M. Spinach Smoothie

Looking for a great start to your morning ? MAKE THIS SMOOTHIE. I know, I know, I was skeptical at first too and now I can hardly get through the day without it.

They give me energy and keep me full until my least favorite meal of the day a.k.a. lunch. You can easily adjust the ingredients to suit your taste.  More or less spinach, small or large banana, less milk or more milk depending on the consistency you like etc. Some people I know add other fruits too like strawberries and blueberries.

So here is how I make mine. This amount fills up the blender. Makes 2 large smoothies. You could divide in half obviously, to make just one but everyone in my house gets in on this action.

s1

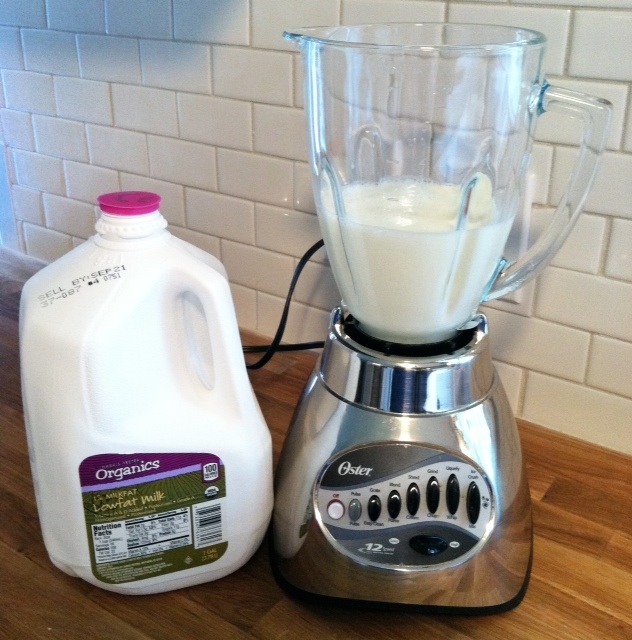
First thing’s first. Add the milk for calcium and a bunch of other good stuff.

s2

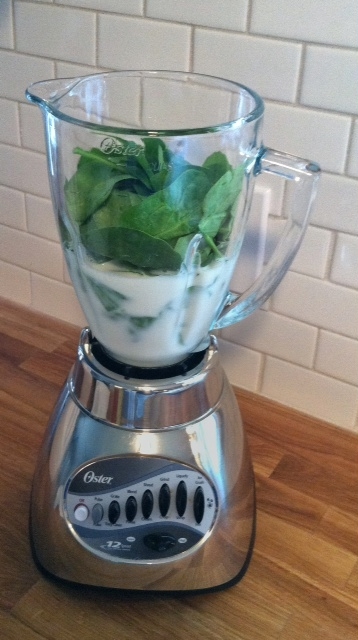
Two big handfuls of the green.

s3

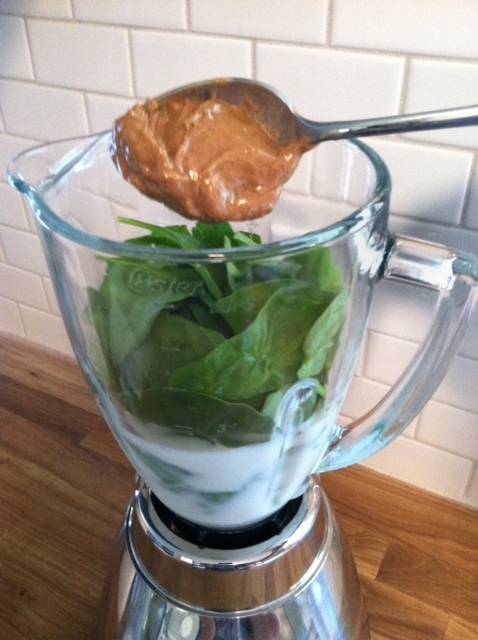
Almond butter for protein. You could certainly use peanut but I can not. Unless you want to see me drool uncontrollably and lose the ability to breathe well.

s4

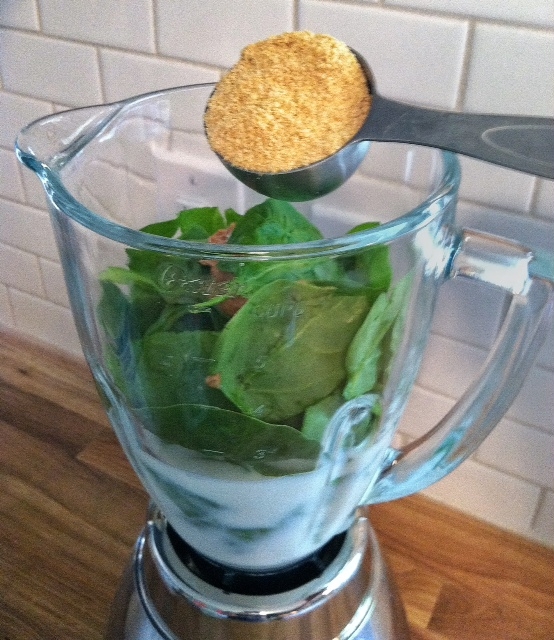
Flax seed powder goes next for some added fiber. I buy a giant bag at Costco that lasts a while.

s5

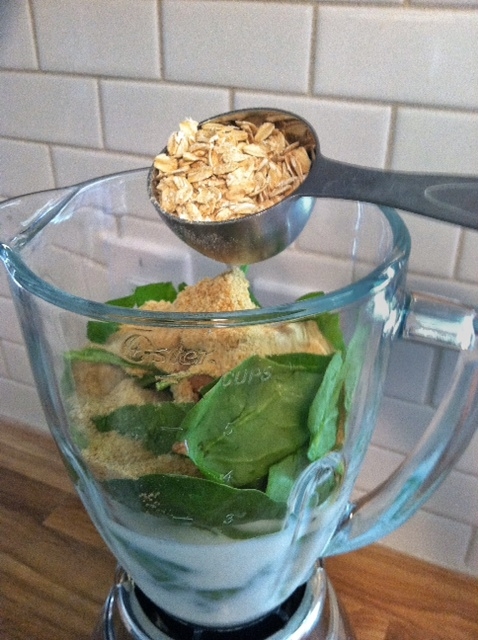
Oats for whole grains that make you full.

s6

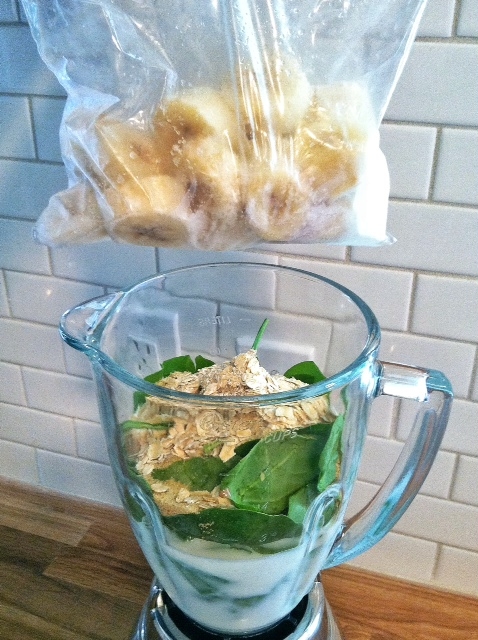
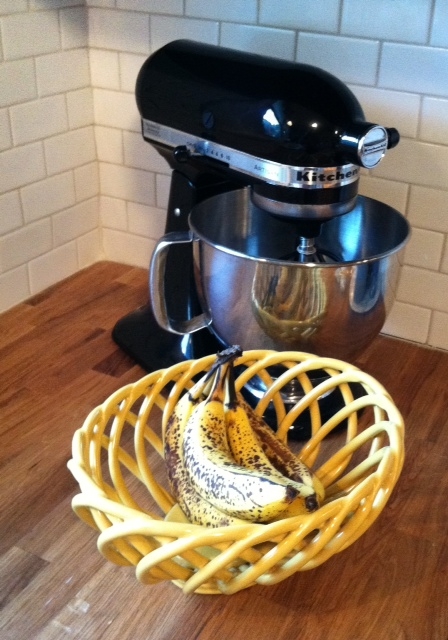
A banana that has been sliced and frozen ahead of time. The riper the banana the sweeter the smoothie. I won’t even get started again on all the benefits of bananas. Trust me, they are magical.
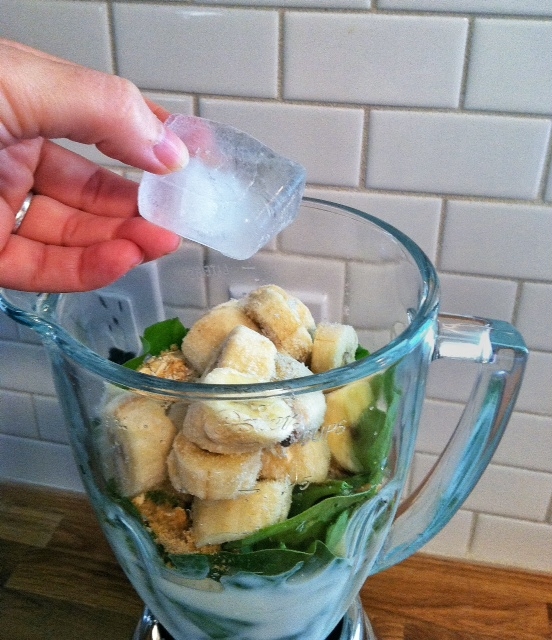
s7

Ice, ice, baby.

s8

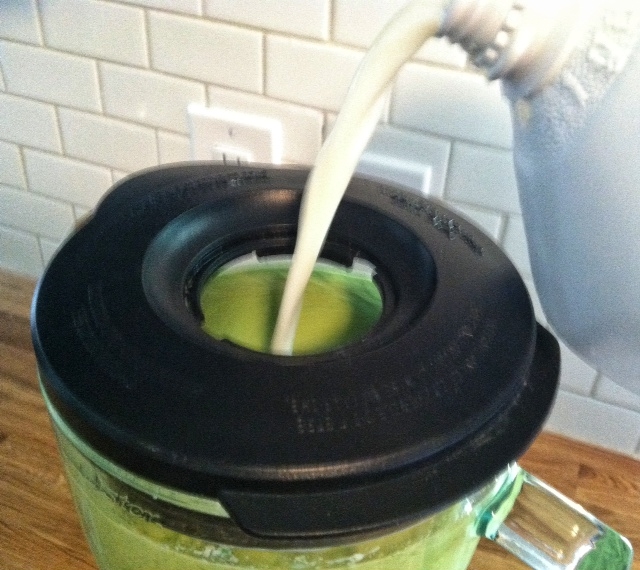
This is where it is up to you again. Just add milk to get to the desired consistency. I probably add 3/4 of a cup more but you can add as much as you’d like. Or, add none at all!

s9

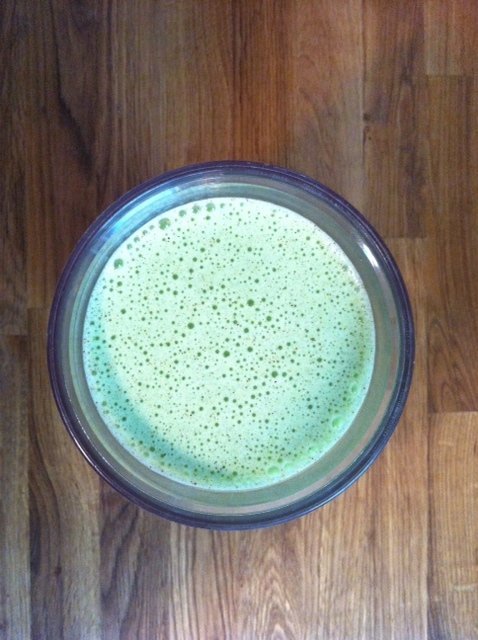
This is what you get.

A big glass of frothy morning deliciousness to get your day off to a great start.

s10

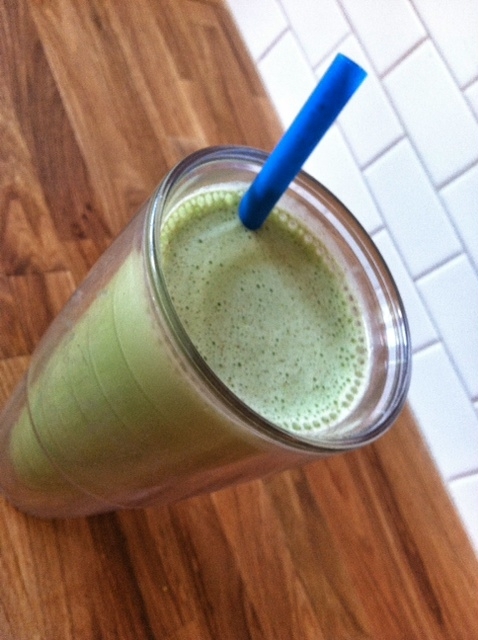
The extra large smoothie straw is a big added bonus.

SPINACH SMOOTHIE 

A Hungry Apple Orignial (<—— Just means I made up the recipe 🙂 )

Ingredients: 

2 Cups Milk (I use 1%, you could use cow milk, almond milk, soy milk) + more to taste

2 big handfuls of fresh spinach

2 tablespoons almond butter

1/4 cup flax seed powder

1/4 cup oats, uncooked

1 large banana, sliced and frozen

1 ice cube

Instructions and Directions:

Add ingredients to the blending in this order. Blend on smoothie or liquefy setting adding milk if needed.

DO YOU HAVE A MORNING RITUAL? 

Mango Pineapple Tilapia and The Weekend

I hope you had a good weekend. Mine was occupied mostly by football and these things:

eggs

Delicious Sunday Morning Breakfast

black beans and rice

Mexican Fare

sam

Welcome back October Sam!

I tried a delicious mango and pineapple salsa from Whole foods a few weeks ago. It was addicting and was finished in one sitting. I thought it would be good on fish and so I decided to copy it.

Turns out, I was right.

Summer isn’t over yet!

salsa bowl

I had a hard time not eating all of this before I topped the fish with it.

salsa fish

MANGO PINEAPPLE TILAPIA

Ingredients Tilapia: 

1 pound tilapia (3-4 fillets)

1 tablespoon pure maple syrup

1 tablespoon olive oil

1 teaspoon smoked paprika

1 teaspoon garlic powder

1 teaspoon chili powder

1/8 teaspoon cumin

1/2 teaspoon salt

1/8 teaspoon cayenne pepper

1/2 teaspoon pepper

1/8 teaspoon cayenne pepper

Ingredients Salsa: 

1 1/2 cups pineapple cut in cubes

1/2 a mango cut into smaller cubes

1 small  jalapeno, seeds and veins removed and very finely diced

1/4 cup red onion, finely diced

2 tablespoons cilantro, finely chopped

1/4 teaspoon salt

1/4 teaspoon pepper

one lime, juiced

Instructions and directions: 

Turn grill or grill pan to medium heat.

Combine all the ingredients for the salsa in a bowl. Cover and refrigerate ahead of time.

In a bowl combine, paprika, garlic powder, chili powder, cumin, salt, pepper and cayenne pepper.

On a plate, rub each side of the  fish with olive oil and then with maple syrup. Dust each side of the fish with the seasoning blend.

Spray grill grates with cooking spray. (The maple syrup with want to stick) Cook each piece of fish on grill approximately 3-4 minutes on each side (depending on how well you like your fish cooked) .

Remove from grill and top with salsa.

Devour.

Carole’s Banana Bread

cooling

Need a treat for the weekend?

I don’t know exactly where this recipe originated but I do know it is the best banana bread I’ve ever tasted. I ate it all the time growing up at my best friend’s house. She and her mom would make multiple loaves at a time and we would immediately devour half a loaf. We would sneak back into the kitchen for another piece repeatedly, until it disappeared!

Before we knew what calories were.

dry ingredients

First you need the dry ingredients.

other ingredients

Then you add these guys.

naners

And of course the naners.

Did you know as your bananas  ripen,  if you don’t have time to make this, you can peel, slice and freeze? Just thaw later when you are ready to make your bread. No excuses!

prebake

After it is all mixed up. Pour the batter into a greased/sprayed bundt pan. You can also use two loaf pans.

in the oven

Then bake-for what seems like forever because it smells so good!

cake whole

People who don’t even like banana bread like this. Check out all the good things bananas can do for you!

bread slice

Banana cake may be a better name for it because it is sweet.  Straight to the hips sweet.

Good for breakfast, with coffee, for dessert or a snack.

Hello Carole! I know you don’t need the recipe, but here it is.

CAROLE’S BANANA BREAD

Ingredients: 

3/4 cup vegetable oil
2 1/2 cup sugar
3 cups all purpose flour
1 teaspoon baking soda
1 teaspoon baking powder
1/2 teaspoon salt
pinch of cinnamon
3 whole eggs
1/2 teaspoon vanilla
1/3 cup buttermilk (or 1/3 cup milk with 1 tablespoon lemon juice)
3-4 mashed bananas, the riper the better
In a mixer or with beaters, combine the dry ingredients.
Add the rest of the ingredients down to the buttermilk. Blend well.
Add bananas and incorporate.
Pour into a bundt pan liberally sprayed with vegetable oil.
Bake on 300 degrees for 1 hour and 10 minutes if using a bundt pan. 40 minutes if you are making loaves.
Let cool 30 minutes before removing from pan.
Serve warm and snack all day.

WHAT IS YOUR FAVORITE SWEET BREAD?

Edley’s BBQ Nachos

After a recent 3 hour hike in Nashville, we left the park famished! We had planned earlier in the day to head to the farmer’s market for a late lunch. We were too late though and  everything at the market was closing up so we had to make a last minute decision about where to eat. Normally this results in driving around aimlessly for 30 minutes.  This can be a struggle. I’ve heard good things about Edley’s BBQ since it’s opening in 2011. I’m not the biggest BBQ fan so I hadn’t been dying to try it but since we were desperate, I gave in.

Best decision ever.

Most of the time we split things because, who could ever eat as much as they give you? Also, I’m not a huge fan of leftovers.  The minute we laid eyes on the menu,  we knew what we would be having.

BBQ NACHOS.

edleys

Now I know I said I didn’t really dig BBQ and normally it’s not my first choice but BBQ nachos are an exception. And these are the best I have ever had.

They have thick sliced potato chips instead of tortilla chips. Sounds strange but it was a smart move on their part. The BBQ Chicken (pork is also a choice) is chopped pretty finely, which I appreciate. The sauce is smokey and sweet with just a little spice and the pico di gallo and sour cream are the perfect topping and give them a very fresh taste. They have a full bar with draft beer (2 of which were Yazoo) and who can argue with beer in a mason jar. Not me.

This was the perfect late lunch/afternoon snack.  I suggest you make your way there as soon as you get the chance.I will definitely be back!

Let me know what else is good!

Creamy Taco Pasta and Tortilla Crisps

taco up close

If I could convince the rest of the household 😛 I would implement Taco Tuesday EVERY week in our house.  This girl loves tacos. The big man on campus will eat just about anything-but eat the same thing every week, he will not.

So I bring you, tacos in disguise. Trickery at its finest.

And it was a hit!

rotisserree chickens

In addition to rotisserie chicken…..

ingredients

you will need these ingredients.  Though the Mexican style beer in the background doesn’t go directly into the pasta, it is a very important ingredient to the meal if you ask me.

cut wedges

These baked tortilla crisps are a welcomed addition to provide a little crunch. Besides,  when you’re eating pasta, who doesn’t want something to scoop with  so you get every last bite!

dos perros

Save room for another one of these too!

Creamy Taco Pasta and Tortilla Crisps

Adapted from Bev Cooks

Serves 4

Ingredients:

2 cups shredded rotisserie chicken

1 tablespoon olive oil

1/2 of a medium sized red onion, diced

3 Cloves of Garlic, minced

3 Tablespoons of taco seasoning

1/2 of a 14.5 oz can of black beans, drained and rinsed

1-4oz can of diced green chiles

1 ear of fresh corn off the cob or 1/2 can of summer corn, drained

1 can diced tomatoes or one fresh tomato

2 cups shell pasta, cooked to package instructions

4 oz cream cheese

3 Tablespoons Greek yogurt

1/2 bunch of cilantro, finely chopped

1 sliced avacado

sea salt and pepper

Lime wedges for serving

For Wedges: (this can be done ahead of pasta)*

2 large fajita sized wheat tortillas

olive oil or olive oil spray

sea salt

*Heat oven to 375 degrees. Line a baking sheet with parchment paper. Brush both sides of tortillas lightly with olive oil. On a cutting board, cut each tortilla with a pizza cutter into 8 wedges. Scatter wedges about on the baking sheet. Sprinkle with salt to taste. Bake 4 minutes on each side or until golden and crisp.

Instructions and Directions:

Heat oil in a large skillet over medium-high heat.  Cook onion and  garlic  for about 4 minutes. Season with taco seasoning, salt and pepper.

Add the beans, corn and diced green chiles. Toss to combine and continue to cook another 5 minutes.

Add the diced tomato and toss to combine.

Meanwhile, cook pasta shells until al dente. Reserve about 1/4 cup pasta water and drain the rest. Add the shells, cream cheese and yogurt to the skillet. Toss to combine unitl cheese is melted and yogurt is combined.

Add some of the pasta water to thin out the sauce if it’s a little too thick. Taste and season with salt and pepper if needed.

Serve with fresh cilantro, sliced avocado,  a lime wedge and tortilla crisps!

taco bowl

WHAT’S YOUR FAVORITE THING ABOUT TACOS?

Summer Jam 2012

adapted from the Delightful Repast

Header Jam

There is a peach tree in the back yard that decides once every few years he will grow some good peaches. This was one of those years! The peaches come along faster than I can keep up with them. This year, we got smart and made Peach Freezer Jam. Any fruit would work but we were up to our neck in peaches.

Unpeeled Peaches

The peaches were small but very sweet.

Peeled Peaches

We blanched the peaches and peeled them  so that we didn’t lose much meat from the fruit before we pitted them.

Jam and Jars

Now for the fun part, filling the jars. This recipe makes 8, 8 oz jars of jam.

FROZEN PEACH JAM

Ingredients:

8-8oz glass canning jars (I used Ball)

4 Cups prepared peaches  (or any fruit)

2 1/2 Cups Sugar

1 package of Less Sugar Sure Gel

The juice of 1 lemon

1 cup of water

Pinch of cinnamon (optional)

Instructions and Directions:

Rinse 8-8oz jars and lids with boiling water. Dry thoroughly  and set aside on a towel.

Bring a large pot of water to a boil and prepare a large bowl of water with ice.

Mark a small x on the bottom of each peach and place a few peaches at a time into boiling water for one minute. Remove the peaches and place them into the ice bath for one minute.

Now the peaches should be easy to peel.

Repeat the process until all the peaches are peeled and the seed is removed.

Place 4 cups of peeled and pitted peaches into a food processor and pulse. This is where you decide how big you want the bits of fruit to be in your jam. I didn’t puree mine, but I didn’t  leave large hunks of peach either.

Pour the peaches into a saucepan over medium high heat just until they boil. Remove from heat and add lemon juice(and cinnamon if you are using it) .

In a separate saucepan, stir together sure gel, sugar and water. Whisk constantly over medium high heat until boiling. Whisk for one minute after it starts boiling and remove from heat. Immediately add the sugar mixture to the peaches.  Stir until well combined.

Using a ladle or a glass measuring cup (with a spout) fill each 8 oz jar. Leave a 1/2 an inch space at the top for them to expand in the freezer.

Immediately cover with lids and wipe the sides of the jars where you may have dripped 🙂

Let the jars sit out on the counter for 24 hours.

Now your jam is ready to eat! Store in the fridge for 3 weeks or the freezer for up to a year!

If you freeze the jam, thaw in the fridge before using.

Vintage Peach Jam

Vintage Jam 🙂

Strawberries

We had so much fun making the peach that we picked up some strawberries.

Strawberry Jam

If you use a fruit that doesn’t have to be peeled, just start with the step where you put the fruit into the food processor.

Strawberry and Peach

And then we made some more peach. Peach and strawberry jam…back together again!

Jam tower

That’s a lot of damn jam.

jam sink

Now go make some jam people!

WHAT IS YOUR FAVORITE FLAVOR JAM, JELLY OR PRESERVES??

Lake Weekend

This weekend we traveled 70 miles south of Franklin to beautiful Tim’s Ford Lake.

The drive down was entertaining with these two.

I have no idea why because the weather was mostly wonderful, but we practically had the whole lake to ourselves! Suits me!

“Rustic” vacations like this are sometimes lacking in the food department in my opinion, just because you don’t have all the conveniences of your kitchen and some people tend to forget things when you’re packing, but I’m not naming names ;).

Days on the boat were accompanied by chicken salad and pimento cheese sandwiches and of course plenty of Bloody Mary’s. You don’t want to get thirsty on a boat. Trust me.

We stayed here. The staff was very friendly and the cabins and boats were clean and comfortable.

The first night in true lake form, we grilled hamburgers and hot dogs (no need for picture of those)

But in true Sara form we also had a cheese plate! (Please notice the lovely glass fish cutting board)

We had a Gouda Robusto (semi firm, nutty Parmesan flavor), Killaree Cheddar (mild, creamy and soft) and Cypress Grove Midnight Moon (grainy and buttery tasting-and my favorite)

We greeted the day with your typical breakfasts and some coffee cup advertising from a local realty company 🙂

We tried a little restaurant on the water in one of the coves the 2nd night. I won’t tell you the name because I wouldn’t want you to go there. But they did have very cold beer!

We had a pretty cloudy/drizzly day while we were there so we decided to take a 20 minute drive to  Lynchburg Tennessee to visit the Jack Daniels Distillery! I cant believe as long as have lived in Tennessee I have never been but it was very interesting!

Jack Daniels is the oldest distillery in Tennessee. This is also the only location in the world where JD is made.  They store the barrels of whiskey in 80 different Barrel Houses to ensure that they are kept separately in case something were to ever happen to one or more of the houses.

The grounds are really beautiful. There are just over 400 employees in all and you can tell they take their jobs very seriously and have a real respect for the process.

Lynchburg is in a dry county so unfortunately no samples are given at the distillery.

Our tour guide said this was the only Jack “on the rocks” you would see at the distillery. You could tell she thought this was funny even though I am sure she has said it 1,000 times.

This tree was right behind one of the buildings on campus. The vapors released during the distilling process turn all the trees within 200 yards black! JD is known for making their own charcoal that their whiskey runs over,  which they say gives their whiskey its distinctive flavor.

Even though I am not a whiskey drinker, I would definitely recommend this tour.

Update: I’m a whiskey drinker now!

After that, the rain cleared out so we hit the trails in the Tim’s Ford State Park!

We saw lots of wild life.

Walked over several swinging bridges.

We saw the first signs of fall.

And had a modeling session with Gage.

The last night we grilled steaks.

I even set the table using newspaper ads as place mats!

We were not ready to leave but we were glad to get back to our kitchen!!

WHAT’S YOUR IDEA OF A WONDERFUL LONG WEEKEND VACATION?

Chicken, Sausage and Shrimp Gumbo

It is going to cool off in Tennessee this weekend and you need something to keep you warm.

Invite a crowd because we’re making a big pot of gumbo


If you find yourself with a little time on your hands then this gumbo is for you.

It takes about 3 hours from start to finish but there is lots of down time in between steps. It’s a good game day recipe and can be made the day before. It is also a good recipe to make when you HAVE to be at home because you are say, auto cleaning your oven or something exciting like that.

Gone are the days of seafood gumbo, sausage or chicken gumbo. This hearty stew has all 3!

Holy Trinity and then some.

At one or more stages of this dish you may wonder if you are doing this right. Forge ahead. It’s going to turn out just fine.

Serves 8

INGREDIENTS:

2 cups rotisserie chicken breast

1 tablespoon canola or olive oil

1 pound smoked sausage or kielbasa, cut into 1/4-inch slices (i use turkey smoked sausage)

1/2 cup all-purpose flour

8 tablespoons butter

1 large onion, diced

6 cloves garlic minced

1 green bell pepper, seeded and diced

3 stalks celery, diced

1/4 cup reduced sodium Worcestershire sauce

1/4 bunch flat leaf parsley coarsely chopped

4 cups warm water or vegetable stock

1 Tablespoon Louisiana hot sauce, plus more for serving

5 beef bouillon cubes

1 14 oz can of petite diced tomatoes

1 16oz bag frozen sliced okra (remove caps, if there are any)

4 green onions, sliced, white and green parts

1/2 pound 31/40 medium shrimp, peeled and deveined


Instructions and Directions: 

Heat the oil in a large dutch oven or pot on medium heat. Add slices of sausage, cook until browned and remove.

Sprinkle the flour over the oil, add 6 tablespoons of butter and cook over medium heat, stirring constantly, until brown, about 20 minutes. Cook longer for darker roux. Let the roux cool.

Turn the heat to medium low and melt the remaining 3 tablespoons of butter. Add onion, garlic, bell pepper and celery. Cook for 20 minutes. Add Worcestershire, salt and pepper to taste and half the parsley. Cook for 10 more minutes.

Add the 4 cups of water (or stock)  and the bouillon cubes. Stir constantly. This is the step that will help break up the bits of goodness on the bottom of the pan.

Add the pulled chicken and sausage to the pot. While stirring, bring to a boil and then reduce to a simmer. Cover and simmer for 45 minutes to an hour.

Add the tomatoes, hot sauce and the okra. Stir, cover and simmer for 1 hour. (stop at this step, if making the day before)

Just before serving, add the green onions, remaining parsley and shrimp. Simmer 5 minutes or until the shrimp are cooked through.

Serve with white rice that has been cooked in vegetable or chicken broth rather than water 🙂

Pear, Pancetta and Goat Cheese Bites

adapted from Southern Living

I would give up dessert for an appetizer any day of the week.

I always like to make an appetizer for visitors but I can never think of anything light enough since most of the main dishes I make for company tend to be pretty filling. These Pear, Pancetta and Goat cheese bites are the ticket. They are salty and sweet and savory all in one. And they are ultra simple!

Lining a baking sheet with with aluminum foil first helps make cleanup a lot easier.

And you can recycle the foil when you are done!

I buy a goat cheese log that isn’t already crumbled.  The pre-crumbled cheese doesn’t seem as fresh and creamy.When you line these up on a serving platter they look so delicious  and are easy to eat in two bites.

PEAR, PANCETTA and GOAT CHEESE BITES

Ingredients:

2 Pears (I used one red and one Bartlett)

14 Slices Pancetta (I asked the butcher to slice them paper thin)

2 oz goat cheese, crumbled

Honey

Freshly ground pepper

Instructions and Directions: 

Heat oven to 400 degrees.

Line a baking sheet with aluminum foil and then with a piece of parchment paper. Bake in the oven for about 10 minutes or until crisp like bacon.  (This step can be done in advance)

Core the pears with an apple corer. Slice pears into 14 thin slices. The pear slices will be almost the same size as the cooked pancetta.

Remove pancetta from oven and drain on a paper towel lined plate.

Arrange pear slices on a serving tray. Top each pear slice with one piece of pancetta and sprinkle with crumbled cheese. Drizzle with honey and a dash of freshly ground pepper.

Would you rather have an appetizer or dessert?

Grilled BBQ Chicken Pizza

The long weekend was a success! If you are anything like me you did a lot of relaxing and a bunch of eating!

We started off the weekend with this pizza.  I get so bored of the usual red sauce and mozzarella with toppings pizzas.

To deal with my boredom, I bring you….variety.

I use Publix pizza dough because as much as we try, we can’t find a home made one that we like better. However, if you don’t have a Publix or a dough recipe you love, I recommend  this one.

Start off by marinating one pound of boneless, skinless, chicken breast cutlets in olive oil, salt, pepper and garlic. Grill and cube. I find that using cutlets makes the chicken so much more flavorful and keeps the chicken from drying out. Then toss in your favorite BBQ sauce.

 A parchment paper lined cookie sheet helps your pizza to bake evenly and keep from burning.

A Silpat would work too.

There a really only 3 toppings:  The chicken, pepper jack cheese and thinly sliced red onion.

For the cheese, forget the pre-shredded bags . The powder on that stuff keeps the cheese from melting to its full capacity.

Decorate your pizza and send it back to the oven to get warm and cheesy.

It is o.k. if you have a large crust. We are going to dress that up with butter, Parmesan and black pepper.

Did you know if you wrap your Parmesan cheese in wax paper it will help preserve its shelf life?

Hell yes-to cheese longevity!


Then, sink your teeth into this guy. Or use a fork. Whichever you prefer.

GRILLED BBQ CHICKEN PIZZA

Ingredients:

1 Large Publix pizza dough (or dough of your choice)

1 Pound boneless skinless chicken breast cutlets

2 Tablespoons Olive Oil

2 minced garlic cloves

1/2 Tablespoon sea salt

1 teaspoon freshly ground pepper, plus more for sprinkling crust

1 Cup BBQ sauce

6 oz shredded Monterrey pepper jack cheese (or more if desired), shredded

1 half of a large red onion thinly sliced

1 pat cold butter

3 tablespoons of freshly shredded Parmesan cheese

Instructions and Directions:

Marinate chicken in olive oil, salt , pepper and garlic. Return chicken to the fridge to marinate.

Heat oven to 375 degrees.

Heat grill to medium-high heat. Grill chicken for 4-5 minutes. Turn over and reduce grill to medium-low. Grill for 4-5 minutes longer or until chicken is cooked through but still juicy. Let chicken rest on a plate covered in foil until it is cool enough to handle.

Meanwhile, spread the dough onto a cookie sheet lined with parchment paper. Bake for 8 minutes and remove.

Cut chicken into small cubes. In a bowl, toss the chicken with the BBQ sauce. Then spread the chicken onto the partially baked dough. Next, top with cheese and onion.

Bake on 375 for 15 minutes or until cheese is melted and bubbling.

Remove pizza from the oven and set oven to broil.

Run the cold pat of butter along the pizza crust, this will help hold the pepper and Parmesan cheese to the crust. Sprinkle the pepper (to taste) and the 3 tablespoons of freshly grated cheese around the rim of the pizza.

Return to the oven for approximately 1 minute until cheese is bubbling and Parmesan crust has browned.                          (Do not leave unattended! This part happens quickly!!)

Let the pizza rest for 5 minutes before slicing.

Top with more Parm, dip in ranch or blue cheese dressing if desired.

What is your favorite kind of pizza?